1
/
de
6
PDG ibma
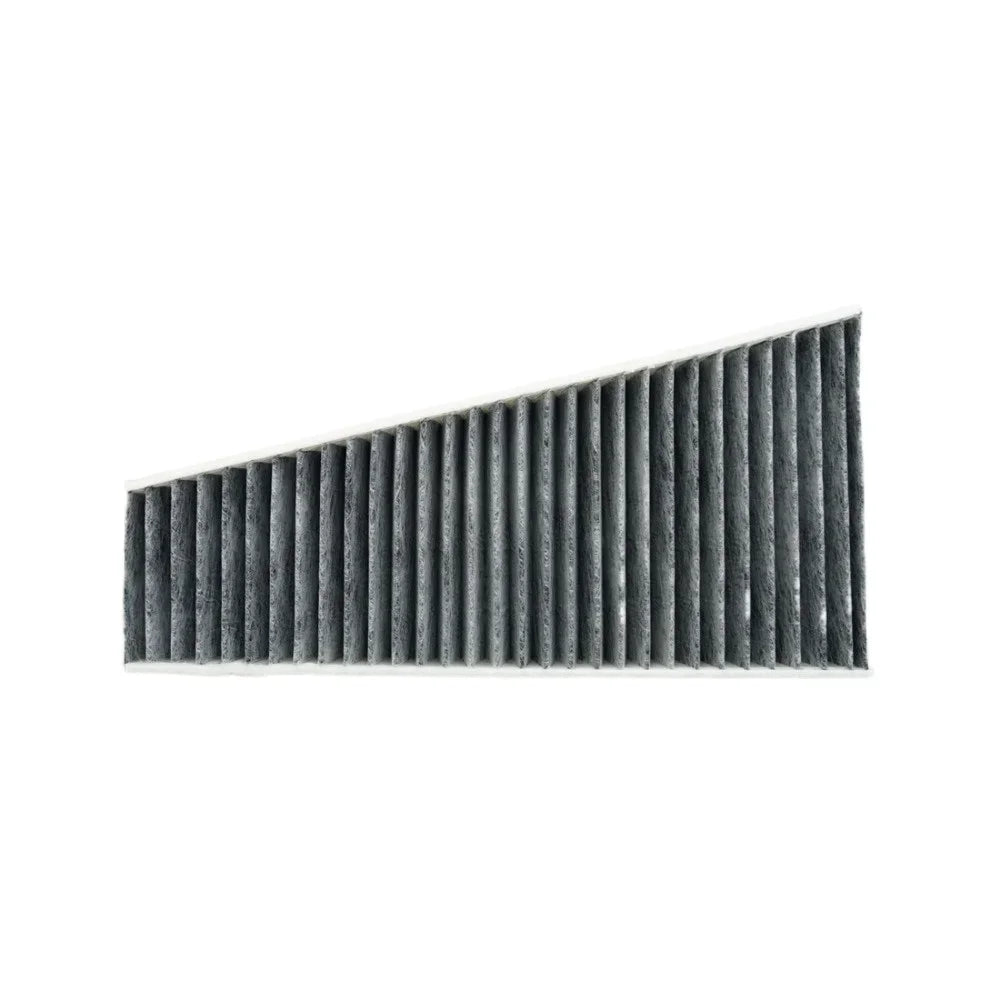
5pcs Cabin Air Filter For Audi A4 B8/Q5 8R/A5 8T 8F S5/External Air Conditioning Filter 8KD819439 8KD819441
5pcs Cabin Air Filter For Audi A4 B8/Q5 8R/A5 8T 8F S5/External Air Conditioning Filter 8KD819439 8KD819441
Prix habituel
CFA7,751 XOF
Prix habituel
CFA13,598 XOF
Prix promotionnel
CFA7,751 XOF
Frais d'expédition calculés à l'étape de paiement.
Quantité
Impossible de charger la disponibilité du service de retrait
SPECIFICATIONS
Brand Name: NONE
Country/Region of Manufacture: China
High-concerned chemical: None
Interchange Part Number: /
Item Height: 52mm/30mm
Item Length: 292mm/259mm
Item Weight: 0.3kg
Item Width: 175mm/129mm
Manufacturer Part Number: 8K0819439/8K0819441
Material: White Silk Cloth
OEM NO.: 8K0819439,8KD819441
Origin: Mainland China
Other Part Number: 8KD819441
Placement on Vehicle: Front
Identify the appropriate model:
The filter sizes, interfaces, and folding methods of different car models varygreatly and cannot be used interchangeably.
Please provide: vehicle brand+model+year (e.g. 2022 for Honda CR-V) or directly check the part number on the old filter element when purchasing.you the better check the size of filters.
Car Filter User Manual
1. Safety Precautions
- Before installing or replacing the filter, turn off the engine and allow it to cool completely to avoid burns or other injuries. - Wear gloves and eye protection during operation to prevent dust, oil or debris from contacting your skin
and eyes. - Use only filters that match your vehicle’s make, model and OEM specifications. Using incorrect filters may damage the engine or affect vehicle performance. - Dispose of used filters according to local environmental
regulations. Do not discard them randomly to avoid environmental pollution. 2. Product Introduction This car filter is designed to effectively filter impurities such as dust, sand, metal particles and oil residues in the air, oil or fuel
system, protect the engine and related components, extend the service life of the vehicle, and ensure stable operation. Applicable filter types: Air Filter, Oil Filter, Fuel Filter (please confirm the specific type according to the
product model).
3. Installation Steps 3.1 Air Filter Installation
1. Locate the air filter housing in the engine compartment. It is usually a rectangular or cylindrical plastic or metal case secured by clips or bolts.
2. Loosen the clips or remove the bolts to open the housing cover.
3. Take out the old air filter and clean the interior of the housing with a clean cloth to remove accumulated dust and debris.
4. Install the new air filter correctly into the housing, ensuring it fits tightly and is not skewed (follow the direction mark on the filter if there is one).
5. Close the housing cover and fasten the clips or bolts firmly to prevent air leakage. 3.2 Oil Filter Installation
1. Park the vehicle on a flat surface and apply the handbrake. Jack up the vehicle if necessary to access the oil filter easily.
2. Drain the engine oil completely according to the vehicle’s maintenance manual, then use an oil filter wrench to remove the old oil filter.
3. Clean the filter mounting surface on the engine to remove any remaining oil and debris, ensuring no dirt is left.
4. Apply a thin layer of new engine oil to the rubber gasket of the new oil filter to ensure a tight seal.
5. Install the new oil filter by hand, turning it clockwise until the gasket contacts the mounting surface, then tighten it slightly with the oil filter wrench (do not over-tighten to avoid damaging the gasket).
6. Refill the engine with new oil according to the specified capacity, then start the engine and check for oil leaks around the filter. 3.3 Fuel Filter Installation
1. Relieve the fuel system pressure first (please refer to your vehicle’s maintenance manual for specific methods) to avoid fuel spraying during installation.
2. Locate the fuel filter (usually near the fuel tank or engine compartment) and disconnect the fuel lines on both sides of the filter (note the direction of the fuel flow to avoid reverse installation).
3. Remove the old fuel filter from its bracket and install the new fuel filter, ensuring the flow arrow on the filter points
to the direction of fuel flow.
4. Reconnect the fuel lines firmly, ensuring no looseness or leakage.
5. Start the engine and check for fuel leaks at the filter connections. If there is no leakage, the installation is complete.
4. Maintenance and Replacement Cycle - Air Filter: Replace every 10,000-15,000 kilometers or 12 months (whichever comes first). If driving in dusty or harsh environments, shorten the replacement cycle appropriately. - Oil Filter: Replace
every 5,000-7,500 kilometers or with each engine oil change (whichever comes first). - Fuel Filter: Replace every 30,000-40,000 kilometers or 24 months (whichever comes first). For diesel vehicles, shorten the cycle according to fuel
quality.
5. Troubleshooting - If the engine vibrates abnormally or the power decreases after installation: Check if the filter is installed correctly, whether it is skewed or not tightly fitted, and replace it with a suitable filter if necessary.
- Oil or fuel leakage: Check if the filter gasket is damaged or not tightened properly, and re-install or replace the gasket/filter. - Excessive fuel consumption or poor acceleration: Check if the fuel filter is clogged and replace it in
time.
6. Note This manual is for general guidance only. For detailed operation, please refer to your vehicle’s official maintenance manual. If you are not familiar with the installation steps, it is recommended to ask a professional mechanic
to operate it.
The filter sizes, interfaces, and folding methods of different car models varygreatly and cannot be used interchangeably.
Please provide: vehicle brand+model+year (e.g. 2022 for Honda CR-V) or directly check the part number on the old filter element when purchasing.you the better check the size of filters.
Car Filter User Manual
1. Safety Precautions
- Before installing or replacing the filter, turn off the engine and allow it to cool completely to avoid burns or other injuries. - Wear gloves and eye protection during operation to prevent dust, oil or debris from contacting your skin
and eyes. - Use only filters that match your vehicle’s make, model and OEM specifications. Using incorrect filters may damage the engine or affect vehicle performance. - Dispose of used filters according to local environmental
regulations. Do not discard them randomly to avoid environmental pollution. 2. Product Introduction This car filter is designed to effectively filter impurities such as dust, sand, metal particles and oil residues in the air, oil or fuel
system, protect the engine and related components, extend the service life of the vehicle, and ensure stable operation. Applicable filter types: Air Filter, Oil Filter, Fuel Filter (please confirm the specific type according to the
product model).
3. Installation Steps 3.1 Air Filter Installation
1. Locate the air filter housing in the engine compartment. It is usually a rectangular or cylindrical plastic or metal case secured by clips or bolts.
2. Loosen the clips or remove the bolts to open the housing cover.
3. Take out the old air filter and clean the interior of the housing with a clean cloth to remove accumulated dust and debris.
4. Install the new air filter correctly into the housing, ensuring it fits tightly and is not skewed (follow the direction mark on the filter if there is one).
5. Close the housing cover and fasten the clips or bolts firmly to prevent air leakage. 3.2 Oil Filter Installation
1. Park the vehicle on a flat surface and apply the handbrake. Jack up the vehicle if necessary to access the oil filter easily.
2. Drain the engine oil completely according to the vehicle’s maintenance manual, then use an oil filter wrench to remove the old oil filter.
3. Clean the filter mounting surface on the engine to remove any remaining oil and debris, ensuring no dirt is left.
4. Apply a thin layer of new engine oil to the rubber gasket of the new oil filter to ensure a tight seal.
5. Install the new oil filter by hand, turning it clockwise until the gasket contacts the mounting surface, then tighten it slightly with the oil filter wrench (do not over-tighten to avoid damaging the gasket).
6. Refill the engine with new oil according to the specified capacity, then start the engine and check for oil leaks around the filter. 3.3 Fuel Filter Installation
1. Relieve the fuel system pressure first (please refer to your vehicle’s maintenance manual for specific methods) to avoid fuel spraying during installation.
2. Locate the fuel filter (usually near the fuel tank or engine compartment) and disconnect the fuel lines on both sides of the filter (note the direction of the fuel flow to avoid reverse installation).
3. Remove the old fuel filter from its bracket and install the new fuel filter, ensuring the flow arrow on the filter points
to the direction of fuel flow.
4. Reconnect the fuel lines firmly, ensuring no looseness or leakage.
5. Start the engine and check for fuel leaks at the filter connections. If there is no leakage, the installation is complete.
4. Maintenance and Replacement Cycle - Air Filter: Replace every 10,000-15,000 kilometers or 12 months (whichever comes first). If driving in dusty or harsh environments, shorten the replacement cycle appropriately. - Oil Filter: Replace
every 5,000-7,500 kilometers or with each engine oil change (whichever comes first). - Fuel Filter: Replace every 30,000-40,000 kilometers or 24 months (whichever comes first). For diesel vehicles, shorten the cycle according to fuel
quality.
5. Troubleshooting - If the engine vibrates abnormally or the power decreases after installation: Check if the filter is installed correctly, whether it is skewed or not tightly fitted, and replace it with a suitable filter if necessary.
- Oil or fuel leakage: Check if the filter gasket is damaged or not tightened properly, and re-install or replace the gasket/filter. - Excessive fuel consumption or poor acceleration: Check if the fuel filter is clogged and replace it in
time.
6. Note This manual is for general guidance only. For detailed operation, please refer to your vehicle’s official maintenance manual. If you are not familiar with the installation steps, it is recommended to ask a professional mechanic
to operate it.
Partager